Snipping Tool – More than Screenshots

In this article, we will provide an overview of several features available in the Snipping Tool. These features include editing images to add annotations, extracting text from images, performing an image search, scanning QR codes, and recording video and audio. We will discuss each of these functionalities individually, demonstrating how they can enhance your productivity and streamline your workflow.
Snipping Tool – More than Screenshots

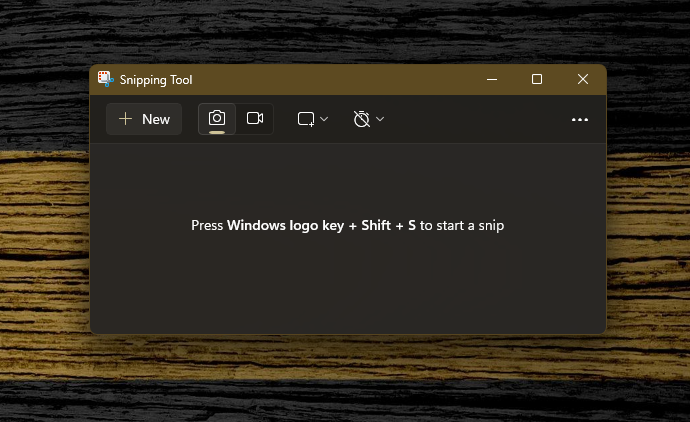
The Windows Snipping Tool, a feature exclusive to Windows 11, is primarily recognized for its screenshot-taking capabilities. When launched from the Start menu, it clearly demonstrates this primary function. However, Microsoft has also incorporated several additional, unexpected, and useful features within this program.

These supplementary features are not widely advertised or easily accessible, which may explain why they are unfamiliar to many users. By opening the Snipping Tool via the Win+Shift+S keyboard shortcut or through the Start menu, users can explore its comprehensive range of functionalities.

In this article, we will provide an overview of several features available in the Snipping Tool. These features include editing images to add annotations, extracting text from images, performing an image search, scanning QR codes, and recording video and audio. We will discuss each of these functionalities individually, demonstrating how they can enhance your productivity and streamline your workflow.


Adding Annotations to Images

The Snipping Tool is not just limited to taking screenshots; it can also be an incredibly useful tool for adding highlights and annotations to any image. Whether you want to emphasize a key message in a text conversation or make notes on a photo, the Snipping Tool has you covered.

To get started, open the Snipping Tool and select the image you want to work with. You can open any image file, not just screenshots, by clicking on the Open File option from the menu. Once the image is open in the Snipping Tool, you’ll notice four buttons on the top toolbar: the pen, the highlighter, the eraser, and the shapes tool (which also includes emojis). Here’s a step-by-step guide to using these tools:

  • Pen Tool: To draw or write on your image, click the pen icon on the toolbar. Clicking the pen icon again will bring up a selection of pen styles and colors. Choose your desired options and start drawing directly on the image.
  • Highlighter Tool: To highlight text or important areas in the image, select the highlighter icon. Clicking it again will allow you to choose the thickness and color of your highlighter. Drag your cursor over the areas you want to emphasize.
  • Eraser Tool: If you make a mistake or want to remove any annotations, click the eraser icon. You can adjust the eraser size by clicking the icon again. Simply drag the eraser over the areas you want to clear.
  • Shapes Tool: For adding shapes, arrows, or emojis, select the shapes tool icon. Clicking it again will reveal options for different shapes and their colors. Click and drag on the image to place the shapes where you need them.
Extracting Text From Images

Snipping Tool, is also an effective OCR (Optical Character Recognition) program. Here’s how to use it for text extraction from images:

  • Identify Text: With the image loaded, click the Text Actions button at the top of the toolbar. This button is represented by horizontal lines inside a frame. Clicking this button will initiate the OCR process and highlight any text identified within the image.
  • Copy Text: Once the text is highlighted, you can select the specific text you want to extract. Use your mouse to highlight the text and then right-click to copy it. Alternatively, you can use the keyboard shortcut Ctrl + C to copy the highlighted text. This text is now available in your Windows clipboard and can be pasted into other programs, such as Word or Notepad, by using the Ctrl + V shortcut.
  • Quick Redact: If your image contains sensitive information like email addresses or phone numbers that you want to ignore, click the Quick Redact option. This feature will automatically identify and exclude such information from the text extraction process.


By following these steps, you can effortlessly extract text from images, making it easier to pull information from receipts, documents, or any other text-containing images.

This screenshot from the Autodesk homepage was used to test functionality of Snipping Tool with different formats as well as imagery. All recognizable text is highlighted, while other portions of the image are faded back a little.
Performing An Image Search

Snipping Tool also offers an efficient way to perform an image search directly from your screen captures. To utilize this feature, follow these steps:

  • Take a Screenshot: Open the Snipping Tool and capture the portion of your screen that you want to search for. You can do this by clicking the New button and selecting the area to capture. Alternatively, you can use the Win+Shift+S keyboard shortcut to initiate a screen capture.
  • Access Image Search: Once you have taken the screenshot, click the Search Image button located in the toolbar. This button typically looks like a magnifying glass. Clicking this button will initiate an image search using Bing Visual Search.
  • Review Search Results: The Snipping Tool will automatically upload the captured image to the image search engine and return a list of visually similar images and relevant information. This can help you identify objects, landmarks, products, or any other visual content captured in your screenshot.


  • Using Visual Search on a screenshot of a knuckle design detail.
Visual Search results from screenshot of a knuckle design detail shown above.

As you can see, it is fairly quick and easy to perform image searches, gaining valuable insights and information from your screen captures. This feature enhances the versatility of the Snipping Tool, making it a powerful tool for both casual and professional users.

Scanning QR Codes

Snipping Tool can be effectively used to scan QR codes with ease. To utilize this functionality, simply capture an image of the QR code using the Snipping Tool by clicking the New button and selecting the area containing the QR code, or by using the Win+Shift+S keyboard shortcut. Once the QR code is captured and displayed within the Snipping Tool, click the Scan QR Code button on the toolbar. The tool will then analyze the QR code and provide the embedded information, such as a URL, contact details, or any other encoded data. This feature streamlines the process of extracting information from QR codes, making it a valuable addition to your productivity toolkit.

Video & Audio Recording

Finally, it is worth noting some of Snipping Tool’s best features for recording audio and video, making it an essential tool for capturing detailed multimedia content. To begin recording, launch the Snipping Tool and select the Record option from the toolbar. This option allows you to choose either audio or video recording, providing flexibility based on your needs. For video recording, you can capture your entire screen or select a specific area by adjusting the recording frame. This customization ensures that you can focus on the content that matters most.

Once your recording area is set, click the Start Recording button to begin capturing both video and audio simultaneously. The Snipping Tool provides intuitive controls for managing your recording, such as pausing, resuming, and stopping the recording as needed. This functionality is particularly useful for creating tutorials, recording presentations, or capturing any on-screen activity with accompanying audio, making it an invaluable addition to your productivity suite.

If you are only recording audio, ensure your microphone is properly connected and recognized by your system. Select the Audio Record option and click the Start Recording button to begin capturing audio. You can monitor the audio levels to ensure clear and high-quality recordings. Once your recording is complete, click the Stop Recording button, and the Snipping Tool will save the file in your designated location.

This feature is particularly useful for creating tutorials, recording presentations, or capturing any on-screen activity with accompanying audio. It also allows you to easily share your recordings with colleagues, students, or clients, enhancing collaboration and communication. The ability to record both audio and video seamlessly makes the Snipping Tool a versatile and powerful tool for any user.

Final Conclusions on Snipping Tool

As you can see, Snipping Tool, is an indispensable application for anyone who needs to capture, edit, and share images with ease. Its straightforward interface and robust functionality make it incredibly user-friendly, allowing even novice users to quickly become proficient. One of the key benefits of the Snipping Tool is its seamless integration with the Windows operating system, which ensures a smooth and efficient user experience. Unlike many third-party screenshot tools, the Snipping Tool is pre-installed and ready to use, eliminating the need for additional downloads or installations.

When compared to other programs that require a subscription or one-time purchase, the Snipping Tool stands out for its cost-effectiveness. Despite being free, it offers a range of advanced features that rival those of paid software. For instance, the ability to add annotations, extract text from images using OCR, perform image searches, scan QR codes, and record audio and video are all included at no extra cost. These functionalities provide users with a comprehensive suite of tools that enhance productivity and streamline workflows, making the Snipping Tool an attractive alternative to paid programs.

In conclusion, the Snipping Tool’s overall usability is exceptional. Its intuitive design and extensive feature set make it a versatile tool suitable for various tasks, from simple screenshots to more complex multimedia projects. The integration of advanced features such as OCR and video recording further solidifies its position as a powerful productivity tool. By offering these capabilities without any associated costs, the Snipping Tool demonstrates that high-quality, efficient software does not have to come with a hefty price tag. This combination of accessibility, functionality, and cost-efficiency makes the Snipping Tool an invaluable asset for both casual and professional users.